A/B testing use case with Turso
Implementing A/B tests at the edge with user data stored in Turso
A/B testing is a user experience research methodology that consists of a randomized experiment that usually involves two variants A and B. A/B tests are a methodology that help test hypotheses that creators might have concerning user behavior to new features.
In this blog, we are going to implement A/B testing on the edge using Next.js’s edge middleware, Turso, the edge database based on libSQL, and GrowthBook, an open-source feature flagging and experimentation platform that also supports implementation at the edge. We are using Turso as the database in this setup to leverage its distributed nature which will facilitate quick user data retrieval speeds.
We are going to use the project that’s found on this GitHub repo to demonstrate the implementation of an A/B test using the above stack.
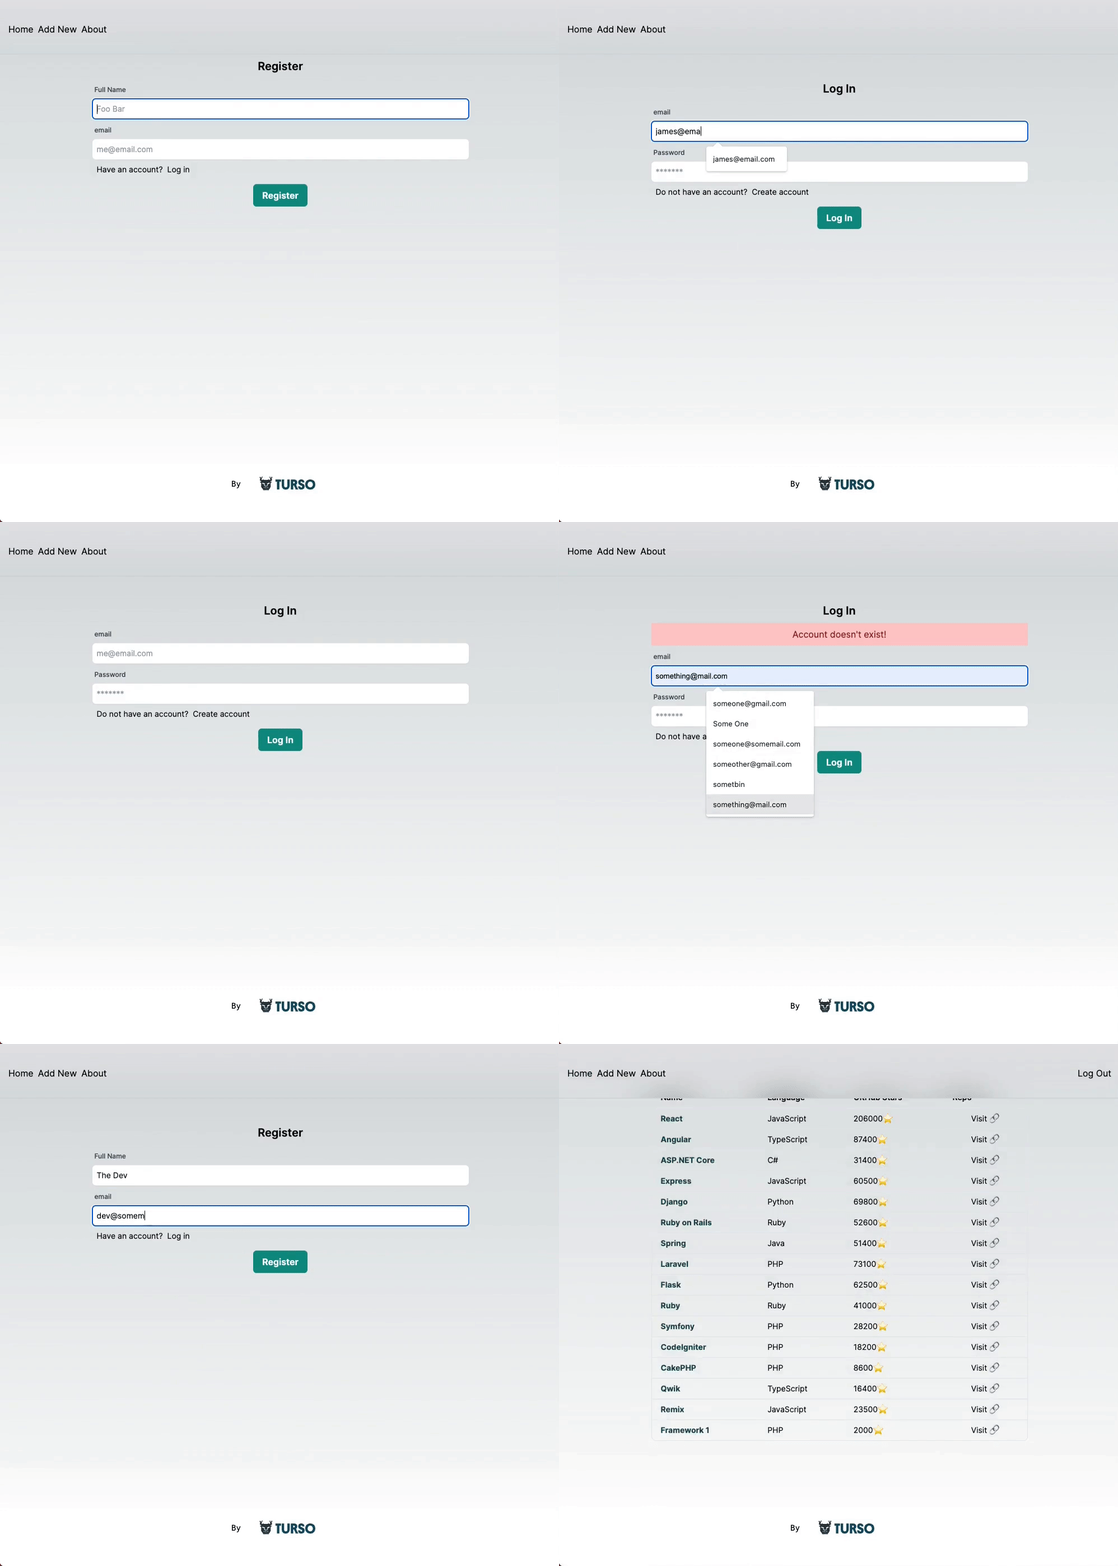
The project in question is a website that lists the top frameworks for developing for the web.
New contributions to the list are made inside the “/add-new” page, but, before you can contribute to the framework list, you need to register for an account.
Say we’ve seen a low number of contributions on this website and we would like to incentivise users into submitting more contributions by displaying the message “Submit a framework to win a prize!”.
So, our A/B testing hypothesis would be along the lines of, “adding an incentive message on the framework contribution page would lead to an increase in submissions”.
Our A and B test choices will be either displaying the incentive message or not respectively, depending on a boolean feature flag that we’ll define which determines whether the incentive message gets shown. And, the target audience for our experiment will be users that have never made framework submissions before.
Let’s go ahead and implement the A/B test on our project to test our hypothesis
Getting started
First, fork the project from the provided GitHub repository and clone it to your local environment.
Next, install the project’s dependencies by running npm install. Rename the env.example file at the root of the project to env.local.
Setting up Turso
The project’s README file provides steps for setting up Turso. After following them, you’ll end up with a database with three tables — frameworks, users, and contributions, with the frameworks table populated with some initial data.
You’ll also get instructions on how to obtain the database URL and token which you’ll use to populate the NEXT_TURSO_DB_URL and NEXT_TURSO_DB_AUTH_TOKEN environment variables inside the project’s env.local file.
Setting up GrowthBook
You can either self-host GrowthBook or use the cloud version, we’ll use the latter for simplicity.
Head over to growthbook.io and create an account.
Next, we’ll follow along the onboarding process as follows
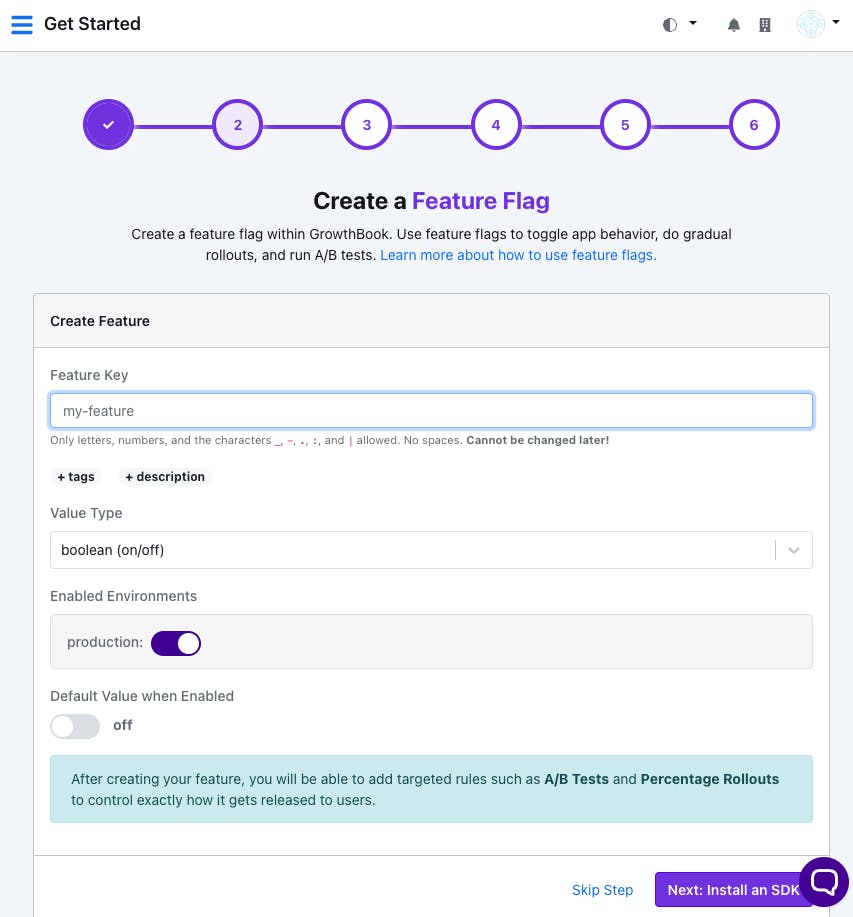
Add a feature: Fill in “add-contribution-incentivizing-message” as the feature key and leave the rest of the fields as they are. You’ll notice that we’re leaving the value type as a Boolean, meaning that the feature is either on or off. The default value when enabled lets us either force an on or off when the feature is enabled in our experiment.
Install an SDK: In this step, you’ll be tasked with creating your first SDK connection. First, fill in “AB Test Demo” as the name of the app, then, select Node.js as the tech stack that applies to our project.
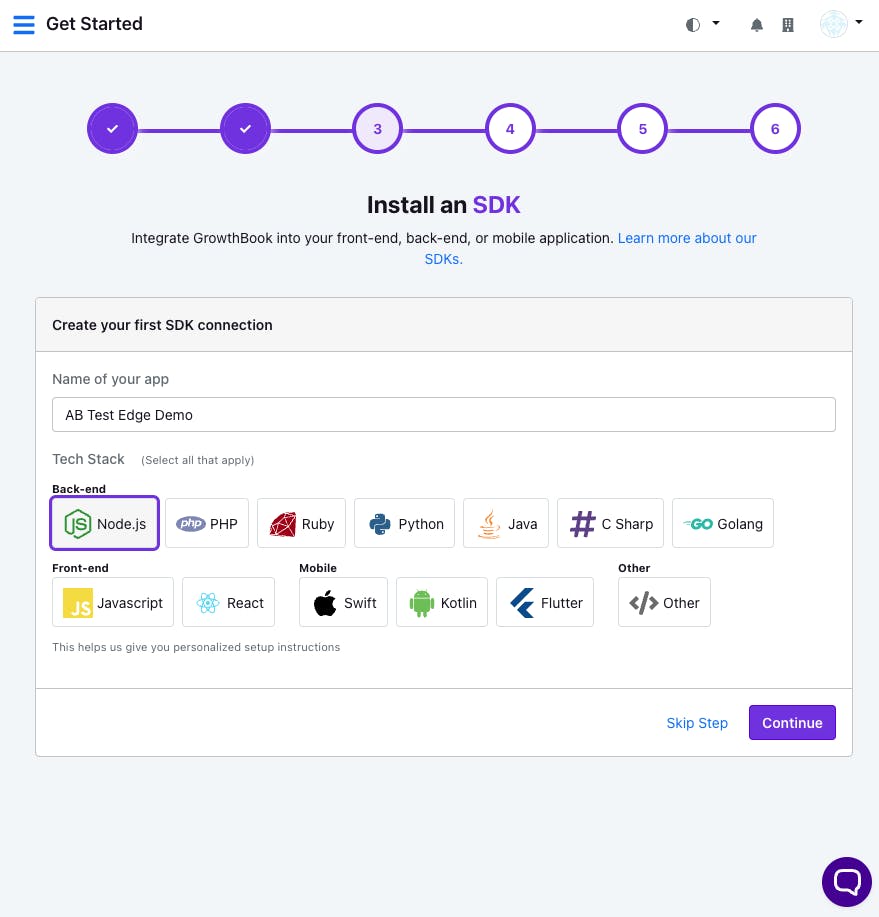
After clicking on the “Continue” button, you’ll be provided with GrowthBook’s starter code for Node.js and some config keys.
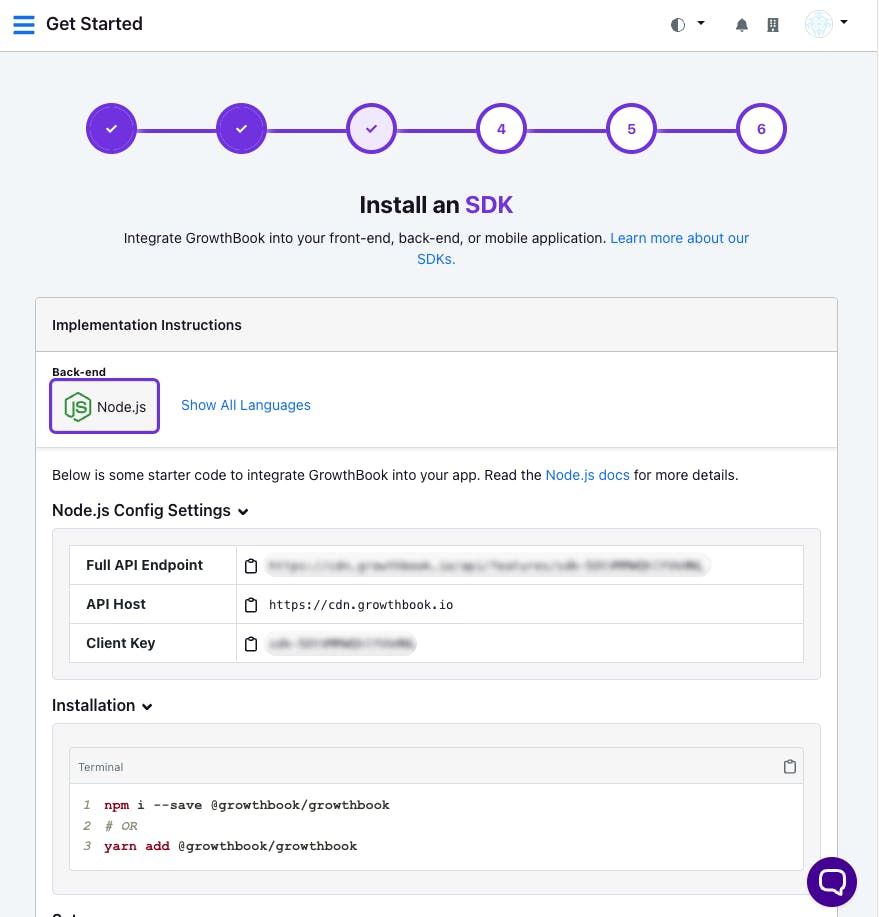
Use these keys to populate the
GB_API_ENDPOINT,GB_API_HOST, andGB_CLIENT_KEYenvironment variables within theenv.localfile.Finally, scroll to the bottom of this page and click “Skip Step” to skip checking the connection.
We’ll also skip the “Add Data Source” step as it isn’t the focus of this post. In short, this is the step where you get to integrate your analytics infrastructure since GrowthBook doesn’t store a copy of your data. You can even add a custom data source.
We’ll also skip setting up metrics, open this link to find more information on them.
Access the menu and go to the All Features page. You should see the feature we just added listed here. Click on it to open the feature configuration page.
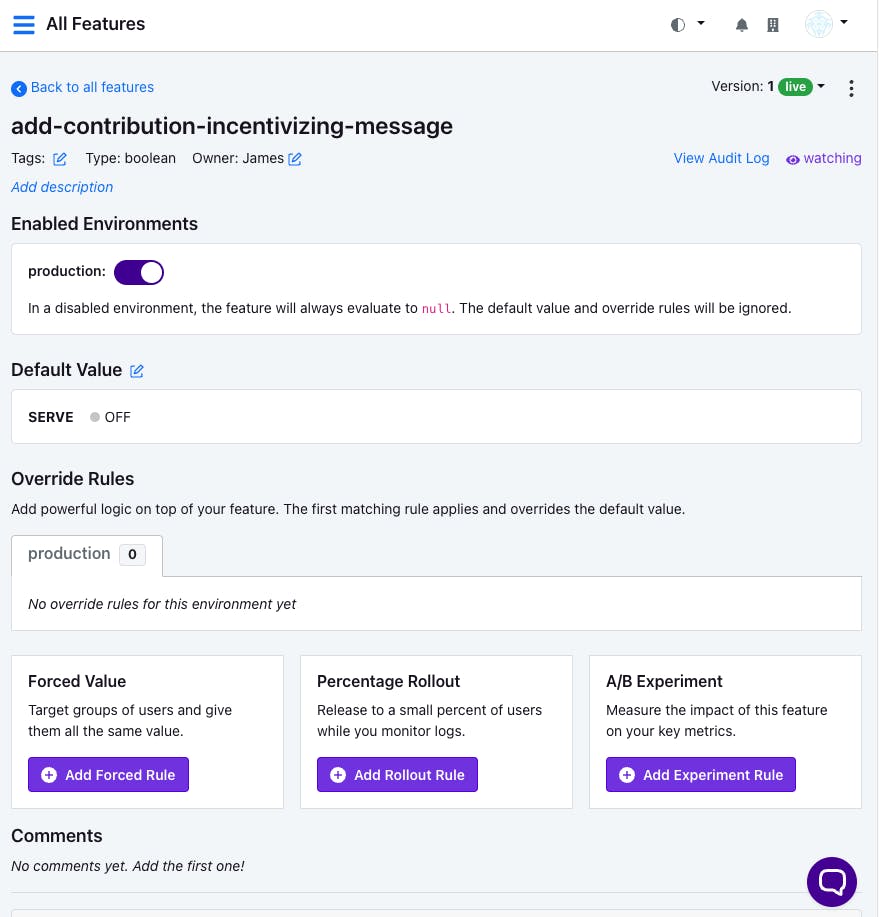
Setting up A/B experiments on GrowthBook
To set up an experiment on the feature we just created, click on the “Add Experiment Rule” button under A/B Experiment. Populate the resulting form’s fields as follows.
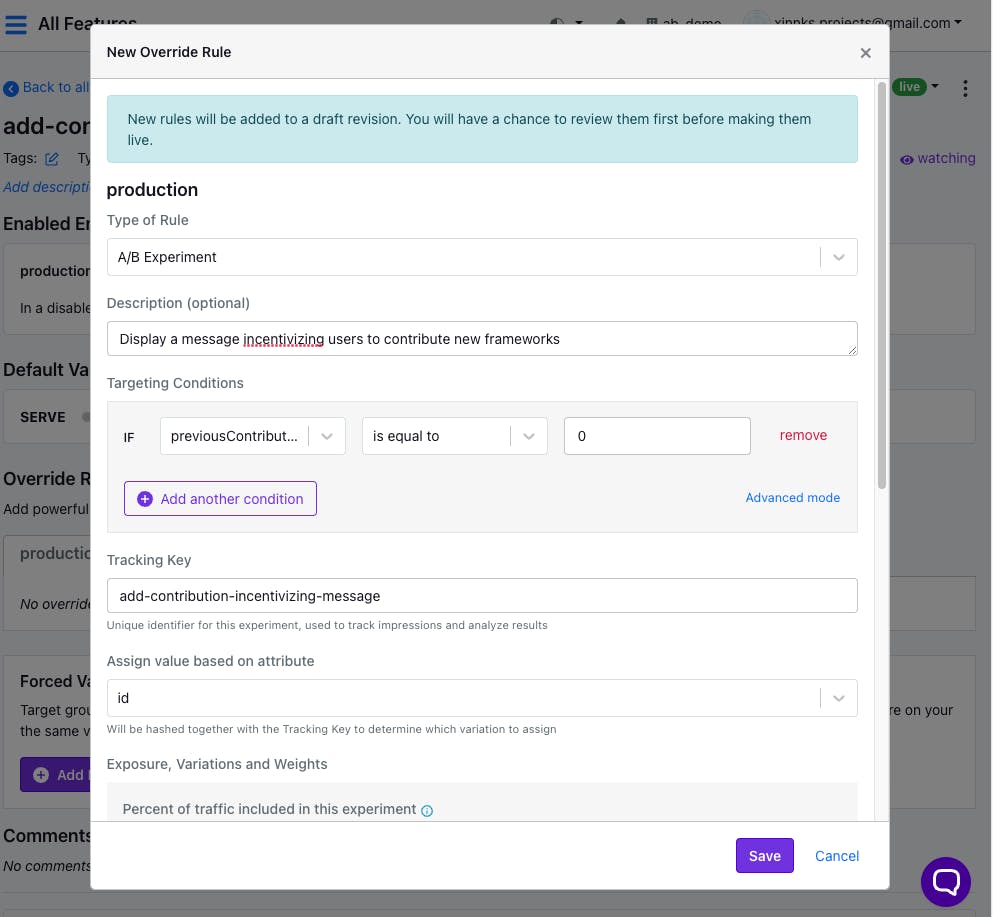
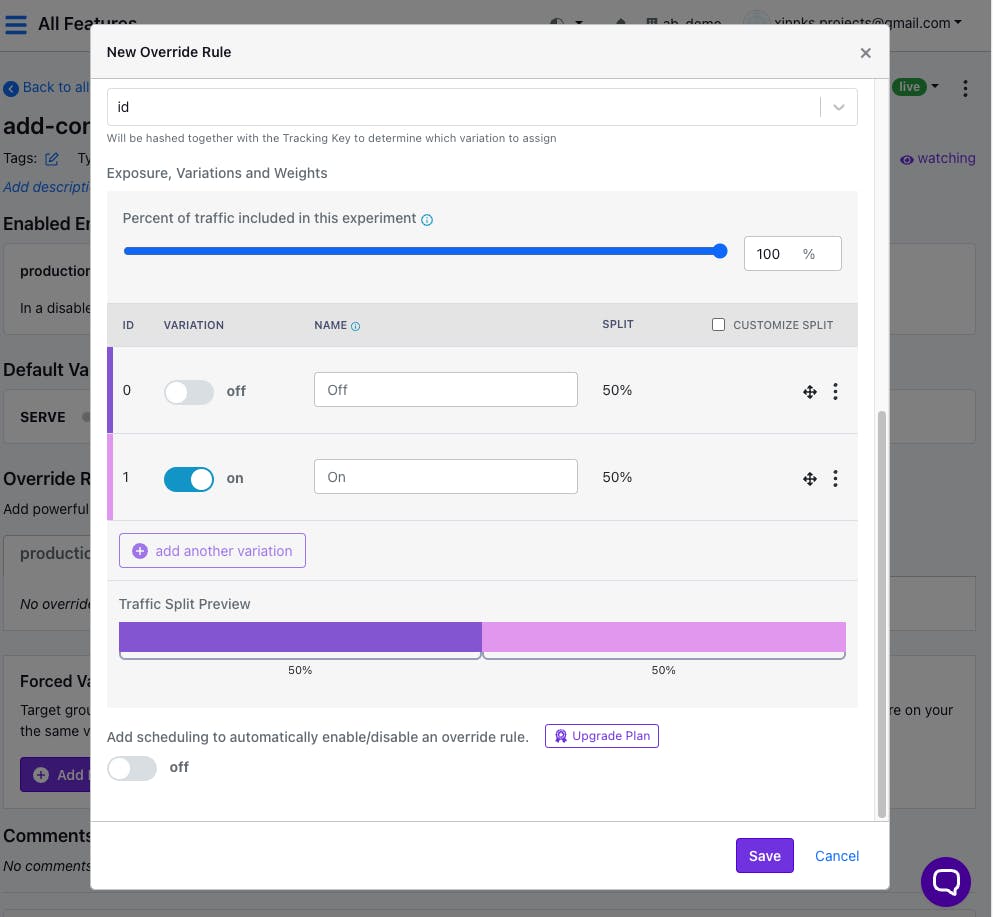
Take note of three important points in this A/B experiment configuration.
First, the previousContribution is equal to 0 targeting condition which means that we’ll only apply the A/B test when the test for this attribute is successful. In short, the target of this experiment is those users that have never made contributions before.
Second, the tracking key add-contribution-incentivizing-message which GrowthBook will use as a unique identifier for this experiment in tracking impressions and analyzing results.
And lastly, the id selected as the input for the Assign value based on attribute field, which GrowthBook will hash together with the tracking key to determine which variant of our experiment to assign.
After clicking “Save”, you’ll see a notification on top of the page asking you to review and publish the added changes.

Review and publish the added changes.
Configure GrowthBook on Next.js’ edge middleware
Back in our project, install the GrowthBook SDK by running the following command.
npm install @growthbook/growthbook
Open the /middleware.ts file found at the root of the project.
You’ll notice that this is an edge middleware with the file runtime set up as experimental-edge.
Since we’ll be conditionally targeting routes inside the middleware, remove the hardcoded path matcher, and instead add a conditional statement to refactor the logic that delivered the city’s name to the site’s home page.
if(url.pathname === "/"){
  url.searchParams.set('city', city)
}
Since we’ll be targeting the /add-new route, add its respective condition.
if(url.pathname.startsWith('add-new'){
  // A/B test implementation
}
All of the following A/B testing implementations will go inside this conditional block.
The first step is checking whether the userId is provided, which per the set-up of our project’s authentication system it’s a cookie with the name userId.
const userId = req.cookies.get('userId')?.value;
if(!userId){
  url.searchParams.set('error', 'Log in first')
  return NextResponse.redirect(url.origin + '/log-in')
}
Next, get the value of the previousContributions attribute we had set as a target condition while configuring our A/B test rules from the Turso database by counting the number of contributions an authenticated user has made to the database.
const user = await tursoClient.execute({
  sql: "Select count(*) as total_contributions from contributions where user_id = ?",
  args: [userId]
});

const previousContributions = user.rows[0]["total_contributions"];
Afterwards, we initialize a GrowthBook instance, using the environment variables we stored above and all the necessary attributes that facilitate the triggering of our A/B test.
const gB = new GrowthBook({
  apiHost: process.env.GB_API_HOST,
  clientKey: process.env.GB_CLIENT_KEY,
  enableDevMode: true,
  attributes: {
    userId,
    city,
    loggedIn: !!userId,
    previousContributions: previousContributions || 0,
    country: country,
    url: url.href
  },
  // Only required for A/B testing
  // Called every time a user is put into an experiment
  trackingCallback: (experiment: any, result: any) => {
    // TODO: Use your real analytics tracking system
    console.log("Viewed Experiment", {
      userId,
      experimentId: experiment.key,
      variationId: result.key
    });
  }
});
The attributes required in the above code for our A/B test to be triggered are previousContributions and id, all the others are included for demonstrational purposes which might apply in other tests. The id is mainly required for tracking users to determine what variants of our experiment they get to see just as explained before.
trackingCallback() is the callback function that triggers the provided analytics tracking service (which we haven’t configured in this example) that gets called whenever a user is put into an experiment. This will help us track the state of our experiments. In our code, we just emulate this by logging out the experiment information.
The step that follows is the loading of the GrowthBook features which is done by calling the localFeatures() instance function.
await gB.loadFeatures({ autoRefresh: true });
And finally, we check whether the test is enabled or not for the authenticated user by passing the feature key on the isOn instance function.
We use this information to determine whether to show the feature we are testing or not on the client side of our application. In this project, we do so by passing a searchParam to the client that informs it what to do.
if(gB.isOn("add-contribution-incentivizing-message")) {
  url.searchParams.set('show_contribution_incentive_message', "Enabled!")
} else {
  url.searchParams.set('show_contribution_incentive_message', "Disabled!")
}
Displaying features on the client
After having determined the variant of the test to be displayed to the current user, we finally apply the necessary logic on the client side resulting in either displaying the feature or not.
In our project, we need to check the value of the show_contribution_incentive_message searchParam passed from the edge on the target page, in this case — /add-new, and displaying the feature depending on the provided state.
const {error, message, show_contribution_incentive_message} = request.searchParams;

return (
<!--HTML markup →
  {
   show_contribution_incentive_message.includes("Enabled") && <div className='bg-blue-200 text-blue-800 p-2 w-full'>
    Submit a framework to win a prize!
  </div>
  }
)
Since we are observing first-time submissions, we should add logic to the framework submissions endpoint that records all the submissions made by the target audience of our A/B test.
if(add.lastInsertRowid){
  const contributions = await tursoClient.execute({
    sql: "Select count(*) as total_contributions from contributions where user_id = ?",
    args: [userId]
  });

  const previousSubmissions = contributions.rows[0]["total_contributions"];

  await tursoClient.execute({
    sql: "insert into contributions(framework_id, user_id) values(?, ?)",
    args: [add.lastInsertRowid, userId]
  })

  if(!previousSubmissions){
    // TODO: Trigger hypothesis supporting event on your real analytics tracking system
    console.log("Made Contribution", {
      userId: userId,
    });
  }
}
Depending on the data collected over a specific period we will be able to eventually have statistical data that would either back, disqualify, or render our hypothesis inconclusive. We can then make data-backed decisions on the implementation of features.
This completes the implementation of the A/B test using GrowthBook with data stored in Turso on a Next.js edge application.
To see the final version of this project with the A/B test logic implemented, open the edge-ab-testing branch on the repository.
You can proceed to register some users and test to see if the test works as implemented.
Here is a simple demonstration.
